Obtaining complete coverage with a corrector can be a Change In your makeup routine. It is not alone Hiding imperfections; It’s about achieving a Impeccable and natural appearance That lasts all day. If dealing with Dark circles, imperfections or rednessThis guide will guide it through each step to ensure that your corrector game is in point.
Here is a detailed step -by -step guide to obtain full coverage with the concealer
“Preparation: The first step in our Corrector Guide”
Cleaning and hydration
He First step to a perfect makeup appearance is a Clean and hydrated face. Use a soft cleaner to remove any Earth, oil or makeup impurities residue and monitoring with a moisturizing That adapts to your skin type. This creates a soft base and prevents the concealer Hold on to dry patches or look scaned.
Importance of hydration
“Hydrated skin is happy skin“. Dehydration can make your skin look Bored and accentuates fine lines. Drink A lot of water and use moisturizing products To keep your skin plump and soft.
Applying eye cream
He Low Eye Area is particularly prone to dryness. Applying a Eye cream can help keep this area hydrousMaking the corrector application Softer and reducing the probability of wrinkling.
Color correction (optional)
Why use color concealers
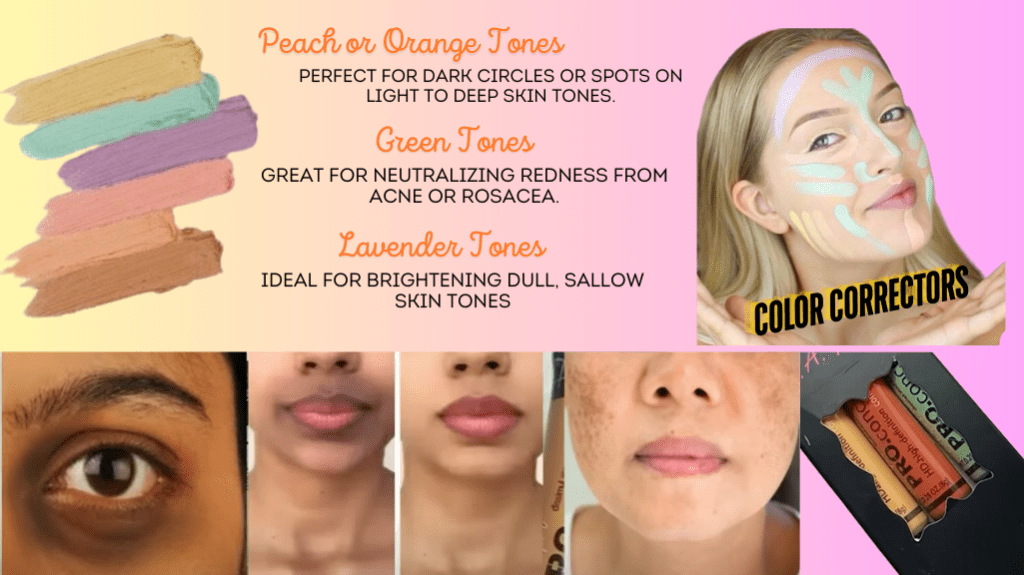
Before applying the corrector, you may need Neutralize any discoloration. Color concealers can be a lifeguard when dealing with Stubborn discoloration. They help Neutralize unwanted tonesfacilitating the achievement of a only skin tone With less product.
Choosing the correct color corrector
- Orange peach tones: Perfect for dark circles or spots in light skin tones.
- Green: Ideal to neutralize the redness of acne or rosacea.
- Lavender: Ideal to illuminate boring skin and boxes.
Techniques for applying color concealers
Apply a small amount of the corrector to the target area using a brush or your fingers. Mix gently before applying your concealer.
Recommended color correctors for complete coverage
Some higher selections include:
Choosing the right corrector:
Understand different corrector textures
Correctors come in several ways:Liquid, cream, stick and pot. For Complete coverage, creamy correctors and High pigment liquid correctors They are your best bet. They provide substantial coverage Without feeling heavy.
Selecting the correct tone:
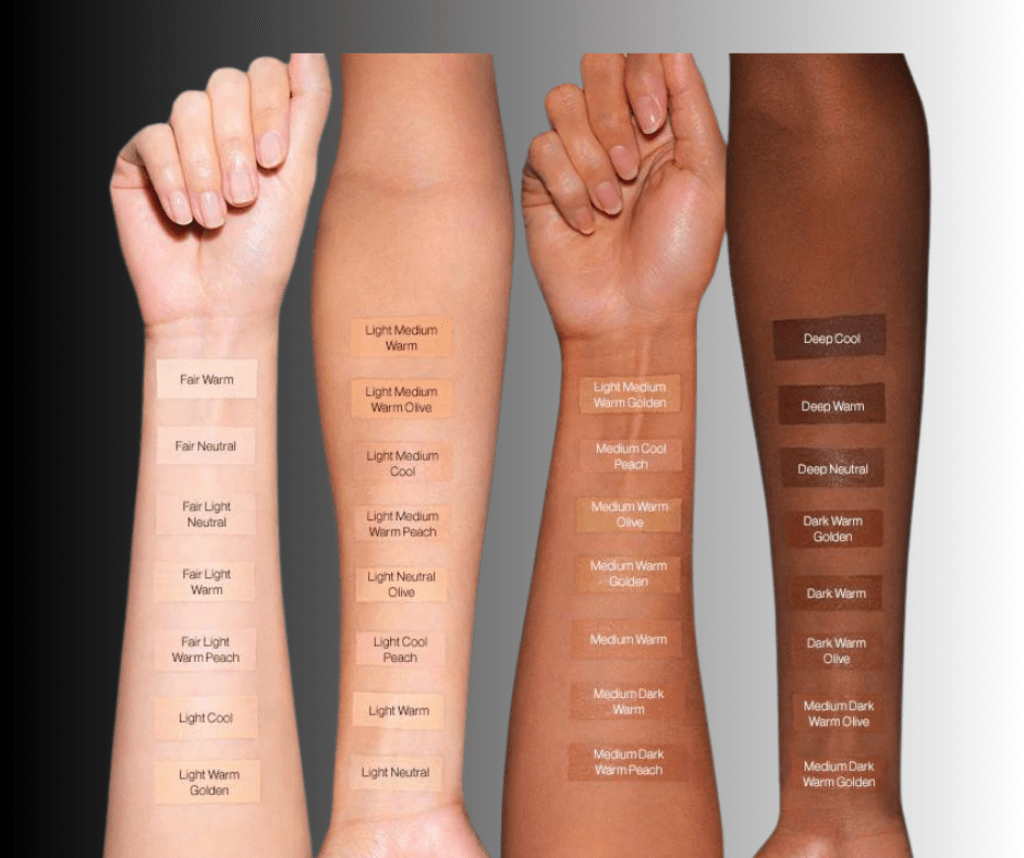
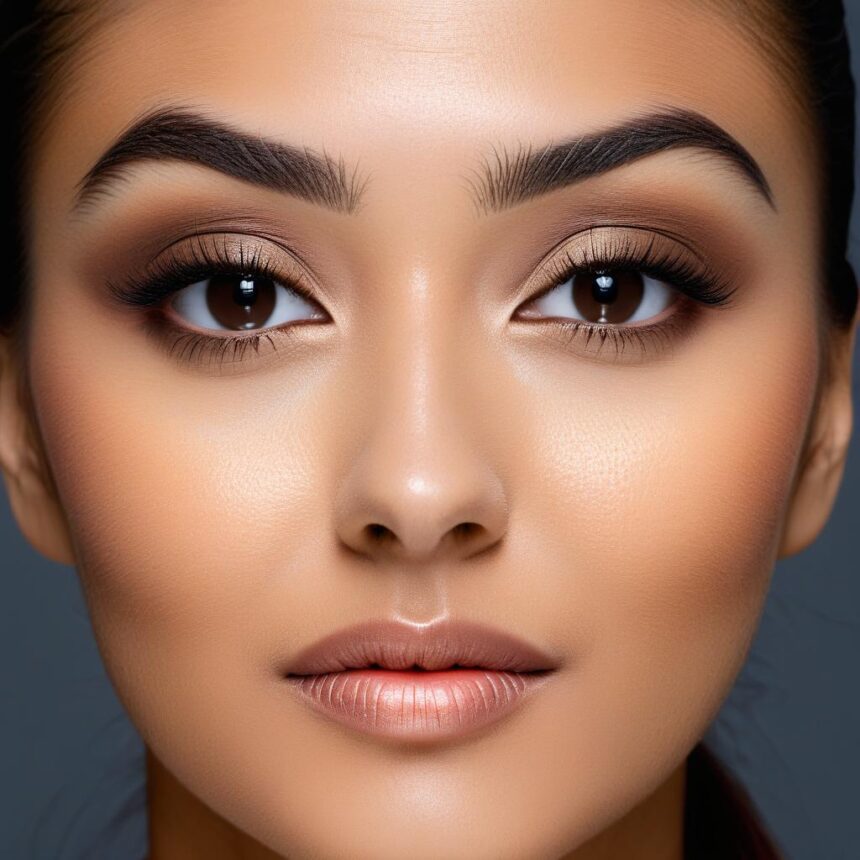
The correct shadow is crucial. To cover Imperfections and imperfectionsChoose a tone that Coincides with your skin tone. For him Low Eye AreaSee a shadow Lorger To cheer up and lift your eyes.
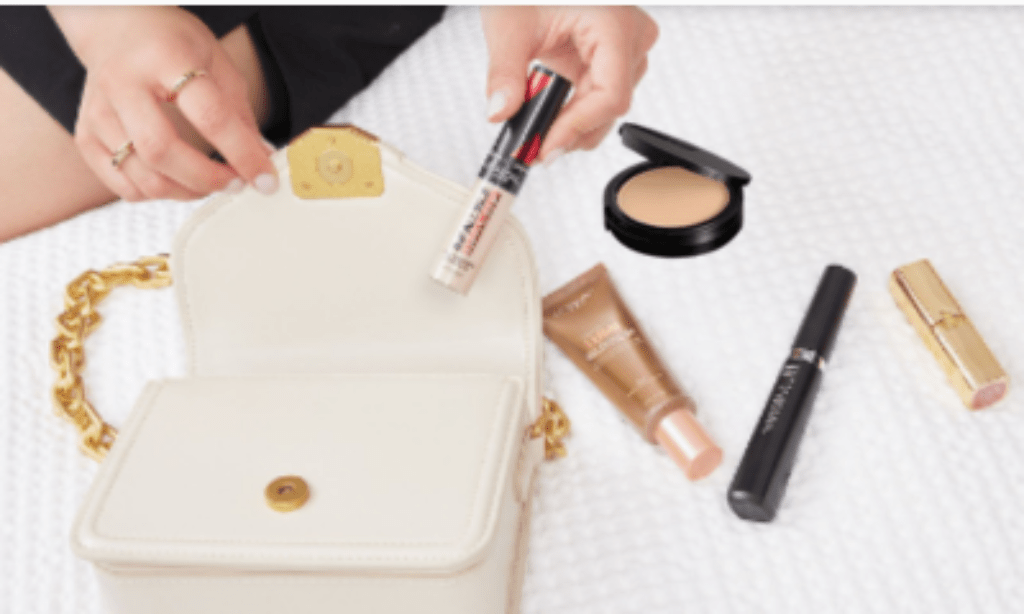
Recommended correctors for complete coverage
Some higher selections include:
Application and tools
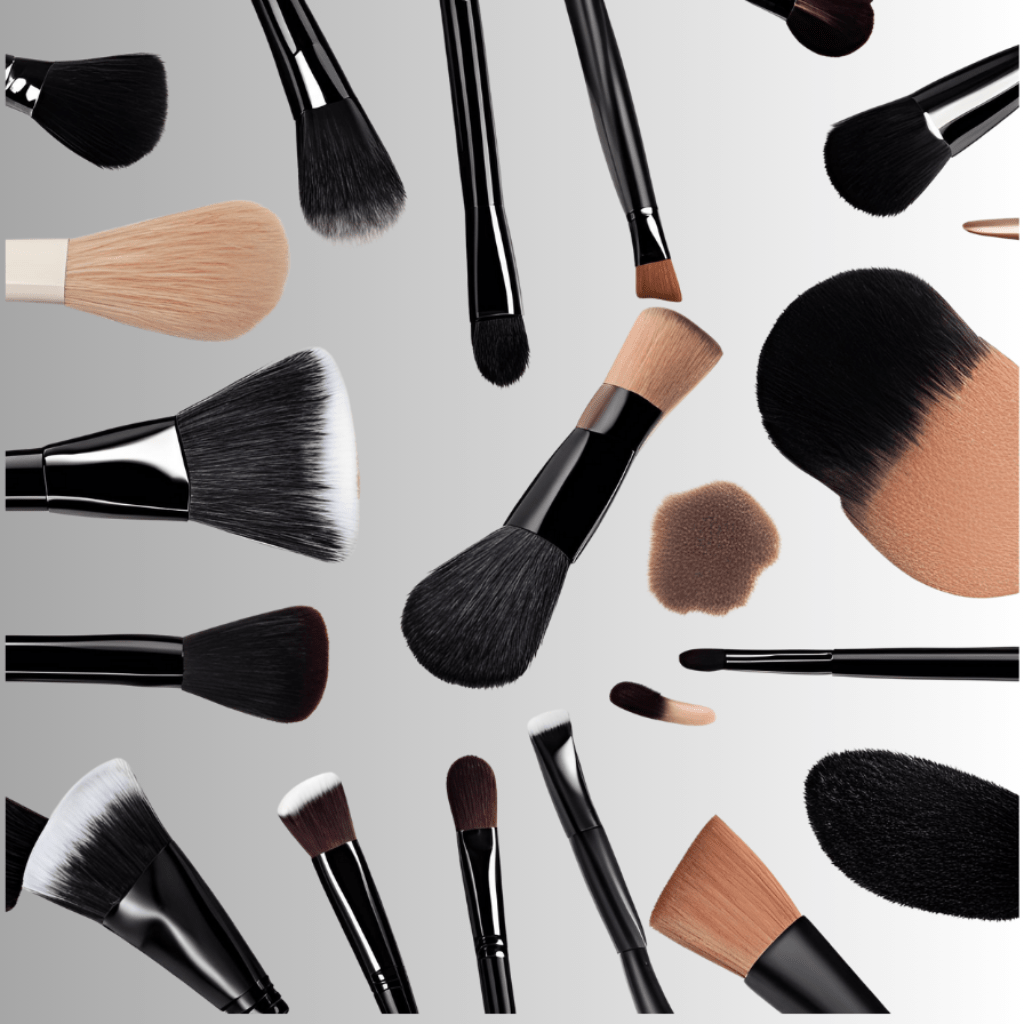
Brush:
Makeup brushes offer precision and control, which makes them ideal for a detailed application. Use them for specific places and areas under the eyes.

Makeup sponges:
A moist makeup sponge offers a finish without a jailer and without aomoso. It is perfect to combine the concealer without moving the product too much.
Using your fingers
Your fingers can heat the product, helping you mix more easily. Touch the corrector gently on the skin for a natural finish.
Application techniques
Apply corrector in thin layers
Less is more when it comes to a corrector. Start with a small amount and figuela slightly on the place you want to cover. This avoids caking and guarantees a more natural aspect.
video
Tapping techniques versus slide
Touch the skin corrector with a brush, a sponge or its fingers. Sliping can move the product and reduce coverage.
Lying down for additional coverage
For areas that need additional coverage, apply the corrector in thin layers, allowing each layer to be established before applying the following. This method guarantees longevity and avoids a cakey finish.
video
Establish the corrector:
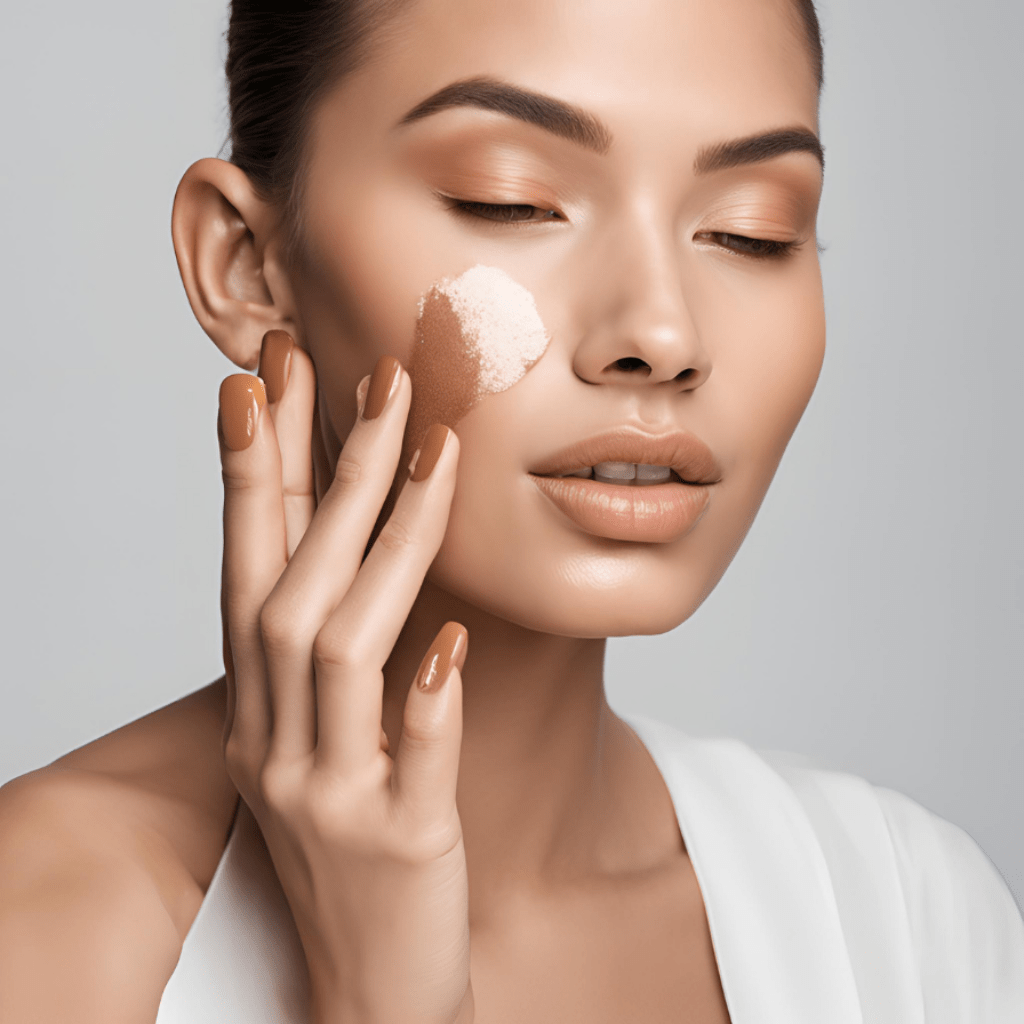
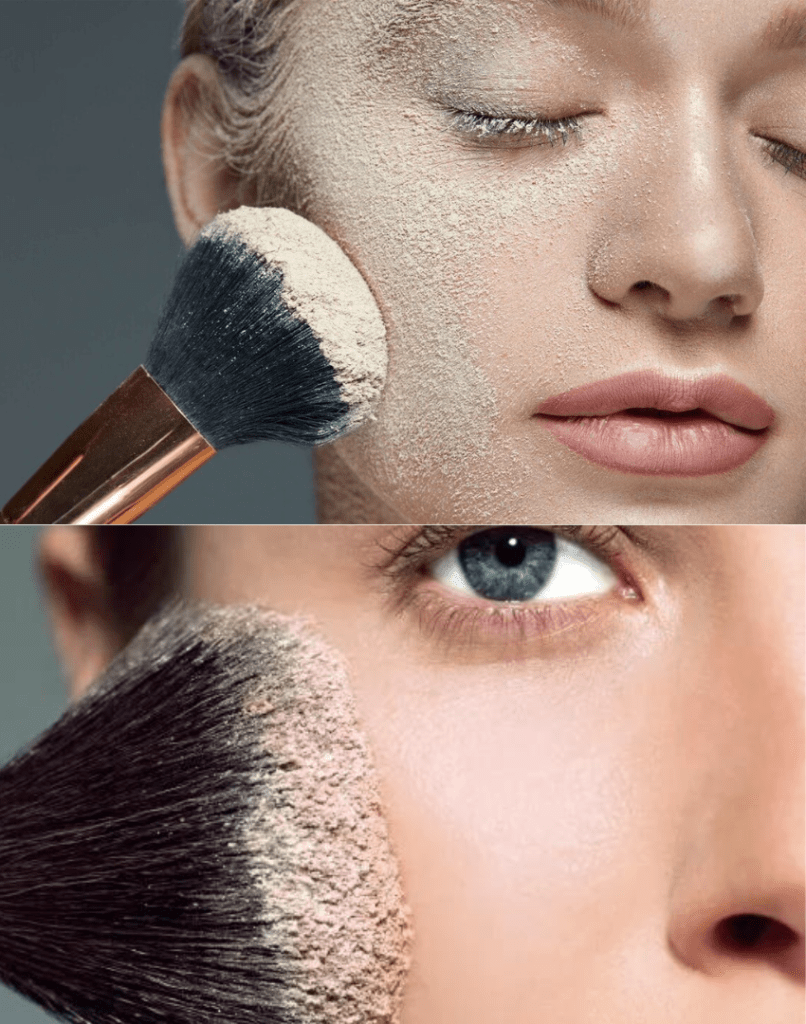
Using translucent dust
Establish its concealer with a Light dust Or translucent dust to block it instead. This prevents wrinkled and Extend the wear time.
Baking technique under the eyes
Bake implies applying a Generous quantity of translucent dust On its concealer and let it stand for a few minutes before brushing excess. This technique is ideal for Ensure lasting coverage and a Illuminated area under the eyes.
Tools to configure corrector
Use a Spongy brush For a light application or a wet baking sponge Under the eyeswhich implies applying a generous amount of dust and letting him sit For a few minutes before Brushing excess.
Application sequence: First Foundation
Always apply you First FoundationThen keep with Concealer. This allows you to see exactly where you need additional cover And prevents the concealer from being Rubbed.
Sewing edges
Mix the edges where the The concealer meets the foundation To avoid any hard line. Use a sponge either brush For this step to guarantee a Soft transition.
Tips for a natural finish
Mix, mix, mix! Use light, Tapping movements To inform the corrector to the base for a perfect appearance.
Special techniques for different areas

Corrector application under the eyes
Apply concealer in a Triangle form Under the eyes, spreading towards the cheeks. This illuminates the face and Cover the effective dark circles.
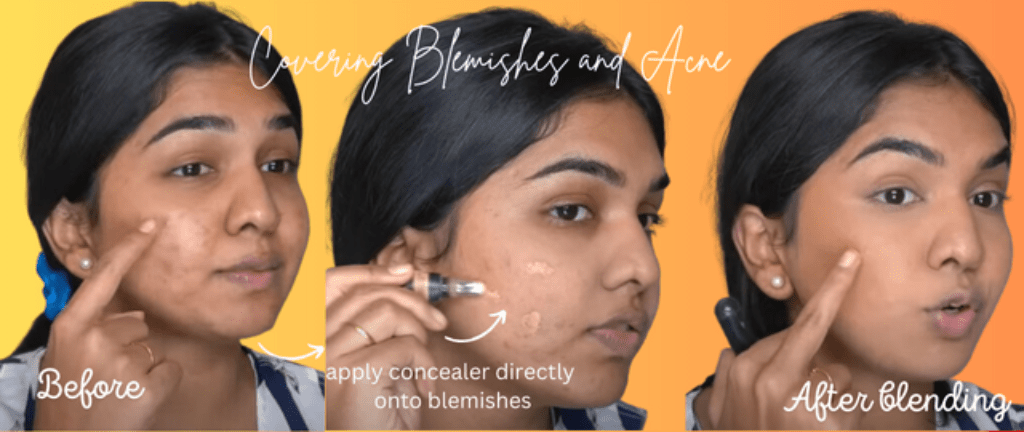
Covering imperfections and acne
Use a small brush for Apply corrector directly on imperfections. Touch gently to Mix and prepare with dust To ensure that the coverage remains.
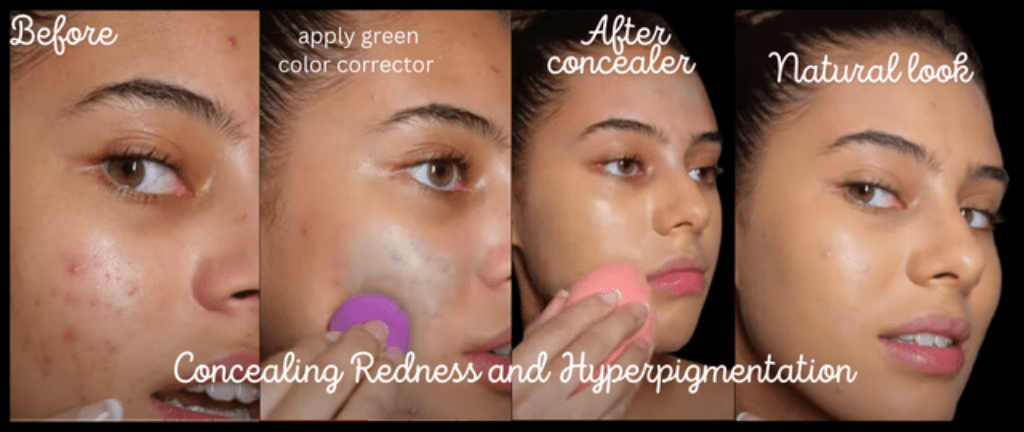
Concealment of redness and hyperpigmentation
Neutralize redness with a Green corrector first, Then keep with a Complete coverage concealer. Apply in thin layers and Mix well For a natural look.
“Final touches: final step in the corrector guide”
Makeup verification in different lighting
Natural Light is the best judge of its makeup application. Verify your makeup in different lighting conditions to ensure that there are no hard lines or unreal areas.
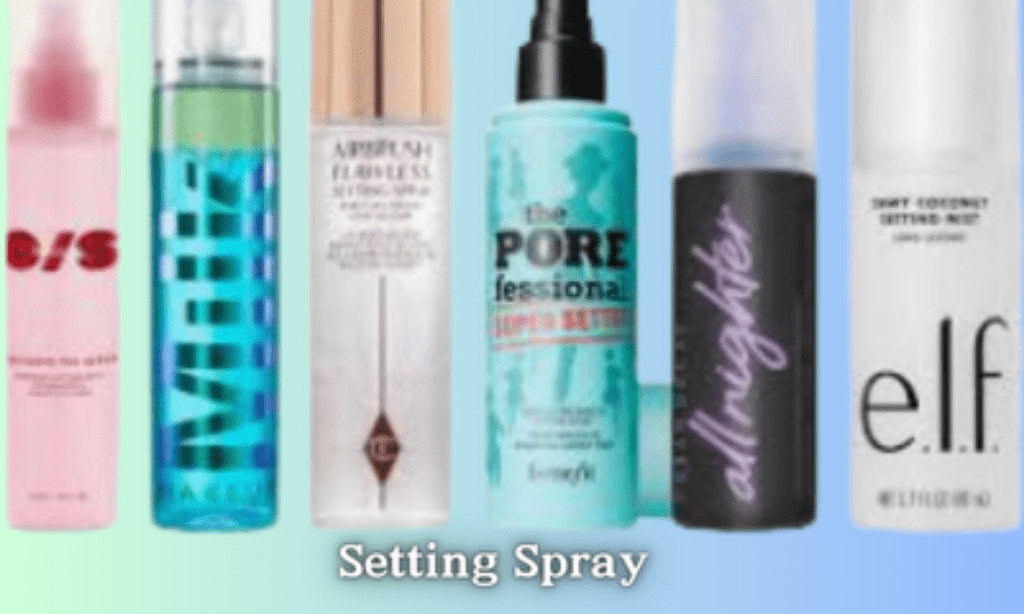
Use of adjustment aerosols
An adjustment spray is not only blocked in its makeup, but also helps combine everything for a more similar to the skin. It is the final touch for a long -term appearance.
Final mixtures and touch -ups
Before leaving, make a final verification and mix hard lines. Take a small corral and dust for a quick touch -up through the day.
Common mistakes to avoid
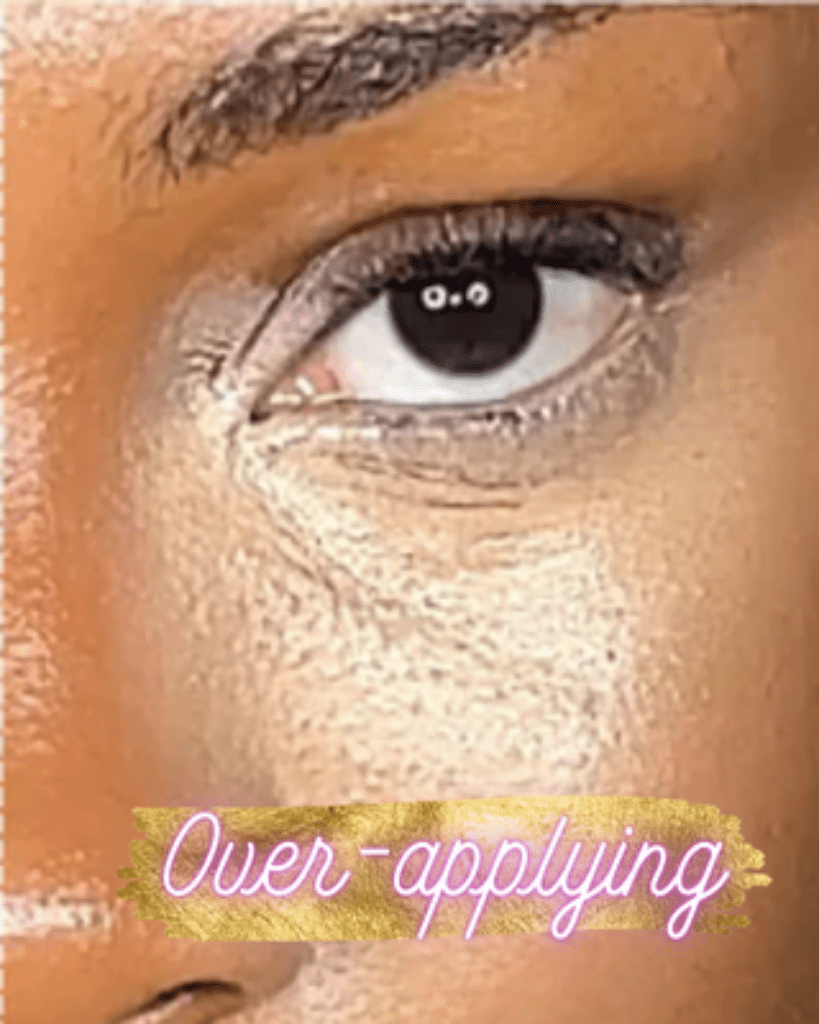
Overloading product
Using too much product can lead to a heavy appearance and cakey. Apply in thin layers and accumulate coverage as necessary.
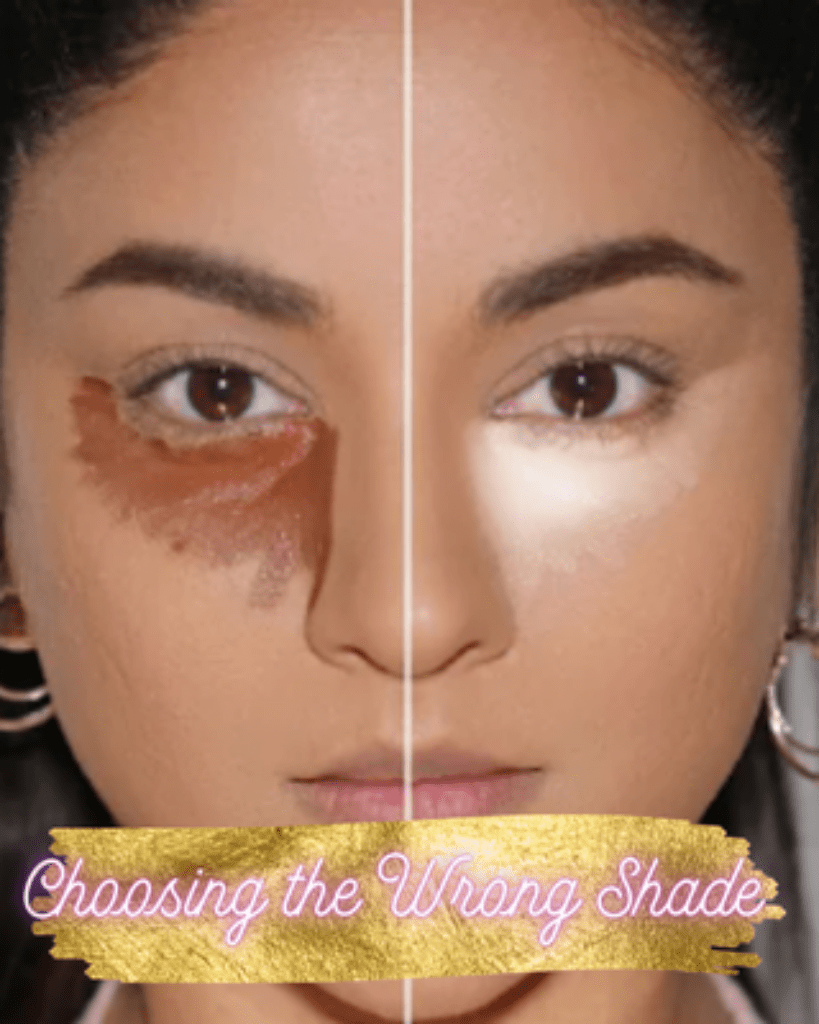
Choosing the wrong tone
Make sure your concealer coincides with the tone of your skin for imperfections and is a clearer tone for areas under the eyes to avoid looking antinatural.
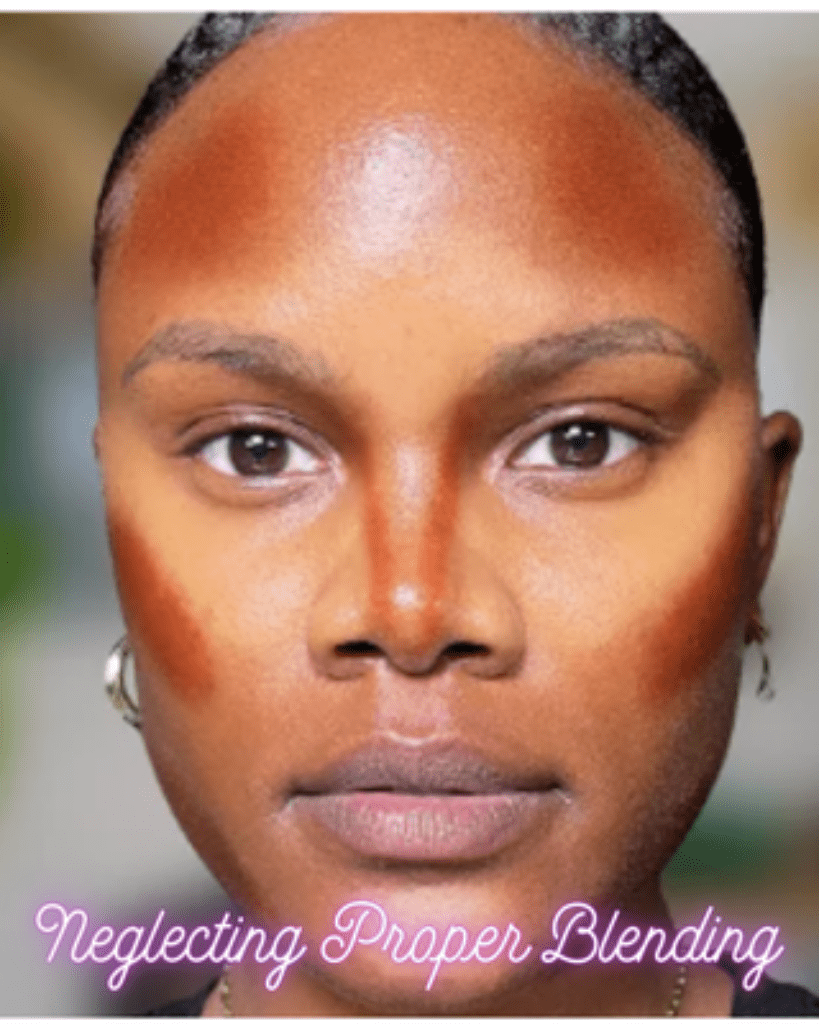
Neglect the clean mixture
Take the time to mix your corrector thoroughly. This step is crucial to achieve a natural and perfect finish.
Professional tips for long -term coverageE In our corrector guide “
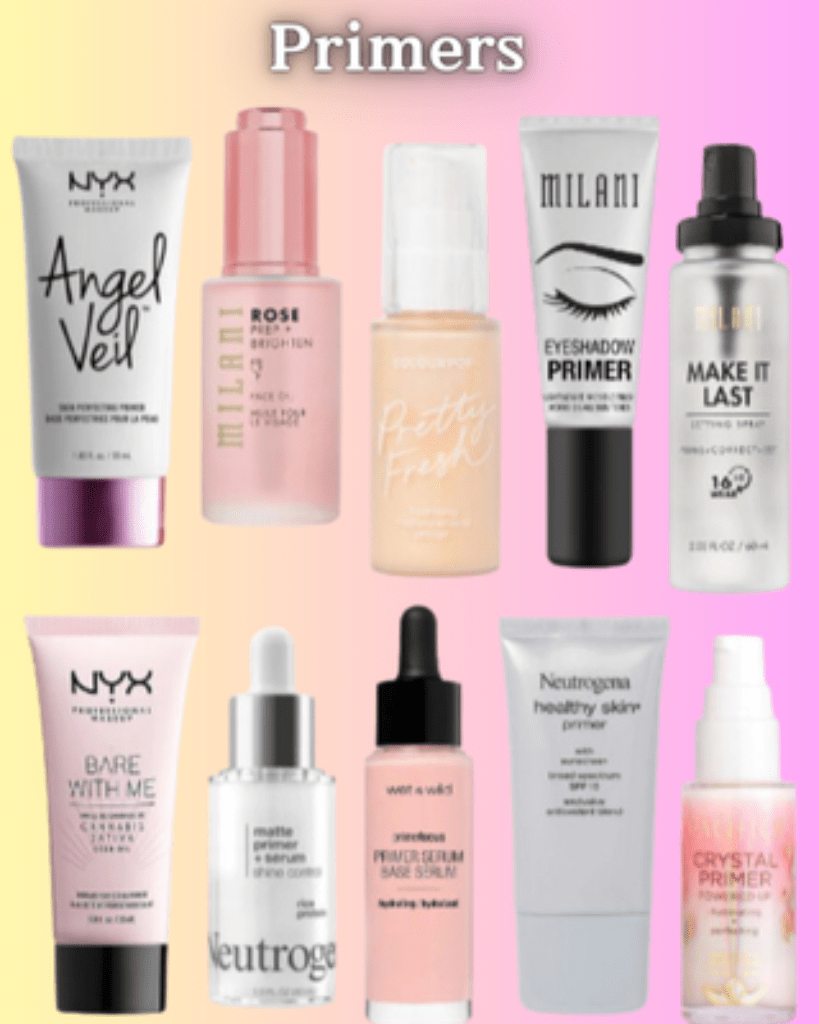
Hydration and primer
Keep your skin hydrated and use a primer to create a soft base for your concealer. This helps the product to adhere better and more.
Using a configuration spray
A spray adjustment is blocked in its makeup, keeping it in place all day. It also helps mix all layers for a cohesive appearance.
Retouching tips for the use of all day
Take a small concealer and powder for a quick touch -up. A small transmitting paper can also help control the brightness without disturbing your makeup.
Conclusion
Mastering the art of complete coverage with the concealer is not just about hiding imperfections, but about doing it in a way that looks natural and feels comfortable in the skin. With correct products, tools and techniques, you can achieve an impeccable finish that lasts all day. Practice and adjust according to their unique skin and concerns to perfect its corrector application for any occasion.